While chugging away at my suffolk/dorset roving, I was thinking of the many plant dyed kilos of ditto upstairs, which has to be fluffed and handpicked to loosen most of the tiny plant particles embedded, before it can be carded into batts/rolags. And decided I needed help with that. If you don’t make that effort, the VM just stays in there or on the drumcarder, forever polluting the next fibers and the next.
Tag: DIY
It tastes like bird,
…said the hag as she cooked soup from a twig where the crow had sat.
As my regular readers are aware, I spend a lot of time optimizing my environment aka house to minimize obstacles to my hobbies, such as rearranging stuff to free up floor space and storage, and building missing equipment. In fact that’s just as fun and creative as painting a picture in some ways….
Change your clothes
After I’ve put on weight I have a notion to camouflage my bum and legs, and besides, the new clothes (a rare treat) I bought last year are still in the closet with labels on, fitting like sausage skins. 🙁 So I decided to try out the concept of dresses, something I’ve been opposed to ever since I was 4 and my granny dressed me up for dance lessons. Shudder. But I actually have the shape for it, because I have a lot of shape, at least I used to when I had a waist. 😉 Anyhow, I couldn’t bear seeing myself in shorts this summer, it’s as if my body type has aged 10 years in 12 months.
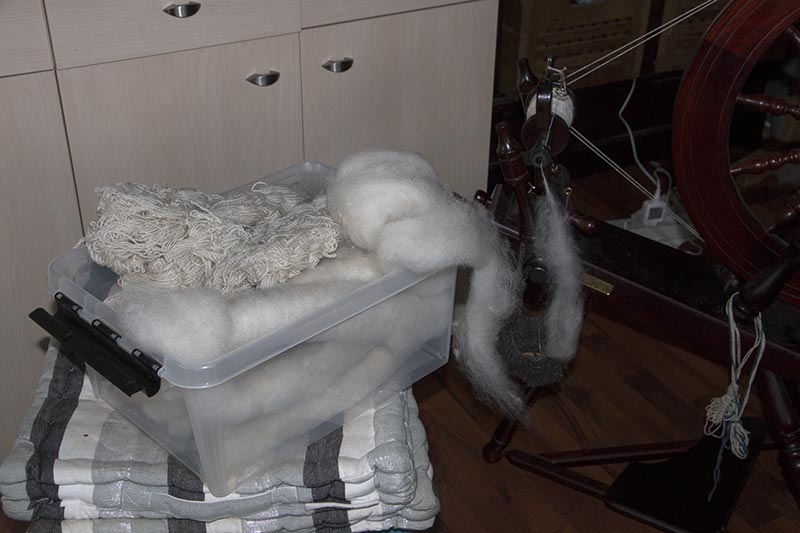
There are plans to weave fabric and use that for clothing, but that all takes a bit of time, so I needed something “now”.
I wanted to keep a low budget, so I mail ordered a bunch of stuff 1-2 sizes larger than my normal. Some were much too large after all, some ok. One dress is actually quite roomy, but the little sleeves, oy! I felt like my armpits were being cut open and the whole dress moved up if I tried to lift my arms.
I decided to keep it however, because I’m not used to inelastic fabric and tend to feel constrained if the fit is close and stiff. But I removed those sleeves and all of a sudden it was fine. In fact I could have just seamed and used it like that, but I’m A. also a bit selfconscious about my chubby arms and B. once it was released from the sleeves, the opening actually became quite large and shows too much bra for my taste, and C. their seaming allowance was very narrow, so the frayed edges show.
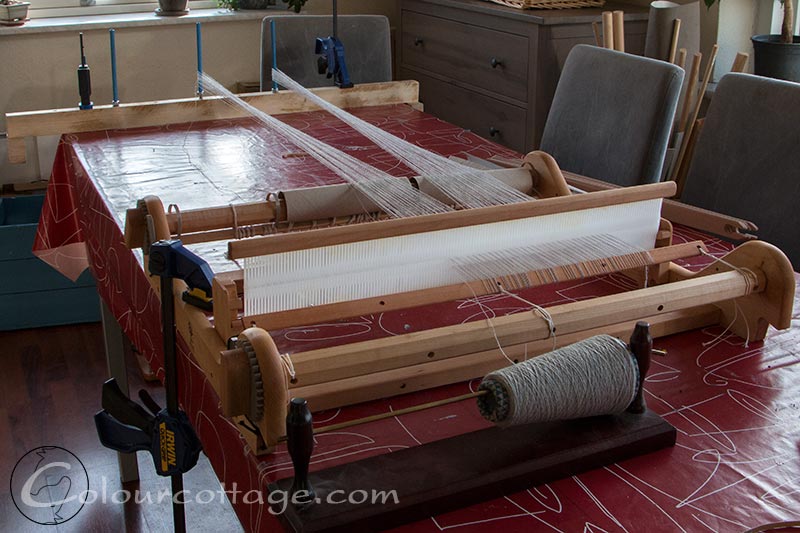
So I went ahead and tried to make new sleeves. It took a lot of paper and three versions from an old bed sheet before I finally had a good template, then it’s just a matter of finding a nice sleeve material. Either look in my box, the thrift shop or weave some, what to do? I’d just warped the loom with something else, so in the end I opted for what I could do on the same day. (it did in fact take me most of the day, which surprised me a bit – had I known I probably would have gone with the visible bra!) I found an old shirt the exact same colour and type of material, not as exciting, but not too hippie either.
I rather like the idea of recycling and making rather than constantly buying new, even if I’d had a large pay check every month. I also like the challenge, and it seems it’s a necessary skill when you’re not an average body type. So I learned to shorten my trousers even as a teenager, and luckily I remember some of the stuff my mum taught me about sewing then. It’s not very pretty, either because I pedal too fast or get my pins stuck in the feeder mechanism, but it works.
Strangely as soon as the new sleeves were firmly attached, there was again some tightness in front and the armhole was raised? Very odd, because the circumference is fine both top and bottom, about 5 cm/2″ more than my actual measurements, so it’s some other design thing. I’m keeping it for now, but I may actually remove them if it gets annoying. As you can see from the template, they’re still vastly improved, but it really isn’t all that simple to figure out! Possibly if I shorten the top end of the sleeve? (as in on top of my arm, making the angle of the hem different) Don’t want it to flare too much either. Anyone who has an idea what angle I didn’t get right, please chime in here! I haven’t actually done anything this elaborate before. I guess it all depends whether I want to wear this outside in the community, or just use it for gardening. In case of the latter, I definitely want to be able to move my arms freely. Maybe I should have done zip on sleeves, LOL.
The other two items that I kept also needed some alterations, but nothing major. All in all it does seem like a good idea though, to sometimes buy a roomy size and then use the excess fabric to tailor the garment a bit to your own dimensions. While I’m in the mood for tentlike, there’s no reason to actually look pregnant… Mimi has really been handy for wearing the dresses while I put pins in them, rather than trying to juggle them flat on the table (amongst cats, paint brushes and whatnot).
But the fact that it takes so long also made me rethink the whole concept – not that I would have spent any less time in shops searching perhaps in vain for something that fit, using diesel to get there and getting annoyed, it still seems out of proportion to spend so many hours on a single task. Just for vanity… Obviously if I knew what I was doing it might not have taken so long, but it’s not how I want to spend my time on a regular basis at the cost of other projects. I try to look for activities that give as much or more back than I put into it – time or money. Some things are worth paying for to get it out of the way, compared to the “joy” you might have of making them. Such as a mechanical ball winder for yarn vs. winding them by (arthritic) hand. Others yield a different value and seem to be worth any number of hours compared to what salary you could have made in the same time, does that make sense?
Watching paint dry
Literally. Is what I was doing yesterday.
First, I forgot to give my boards (for the painting wip storage thing) their last coat of paint the other night, so I had to do it early morning (6 hours’ drying time). The garage is too cold and messy, so I’m doing this on my dining work table in the living room. Which means, cats are going to investigate – so I had to sit and watch (until I quit, locked them in the kitchen and went for my shower).
Then I wanted to try matching the wall colour where I’d filled in holes. Most of the holes were only pin pricks from nails, but you know, even if you wipe, some filler gets onto the wall (structured wallpaper). I was a bit scared to use black in my mix, so I definitely did not get it in first attempt even if I tested on a small portion elsewhere – must have faded a bit there. Each time I tried a new layer, I made the circle slightly wider, to blend it in a bit, right? Not. So I ended up with multiple large splotches on the wall in varying shades of “cream”. I’d like to renovate the room whole house and just paint it white, but that was not today … Of course we all know that most colours dry up a bit darker, so I was having a hard time containing myself from trying new layers and also anxious to know when I’d hit the mark. Perhaps it dries a little faster if I keep an eye on it? I did, just in case. To the point of burning my omelette – which I had to go eat in the bedroom would you believe it, because the cats were very much asking for a third breakfast if I tried to sit down.

Anyway, I eventually broke out the black and it went a bit better. I can’t match the gloss, but it would be nice if it’s not the first thing you notice about the room. I even resorted to using “glazes”. And now it simply has to be good enough. Most of it will be covered in pictures anyway, which was the whole point of the board exercise: To be able to store, dry, hang various small paintings out of the way, to be able to move and rearrange without making new holes every day, and make it slightly decorative as well.
The idea is to hammer nails into the boards instead of the wall, basically. And not have to measure the height every time, just the three options, take it or leave it. I couldn’t find my box of little nails for the purpose, so I have yet to show you the finished result.
G casually asked me if the house is going to end up looking like hippies live here. I didn’t have a definite answer. It’s very much a Danish thing that you should conform, the norm is good enough and no reason to want or be more. While I’ve never really conformed, I have felt restrained at times, both physically (tiny house) and otherwise.
Well, I’m fed up with being less than me. It has nothing to do with feeling better than others, simply that I want to be all of me. Not just some parts of me, the acceptable ones, the managable ones, the inconspicuous ones. And if being me right now involves turning this tiny house into a workshop with looms on the wall and arranged for storage space rather than a modern show home, so be it.
Yarn tools
I love it when things can be made from the “what’s in the woodshed” principle as well as having more than one purpose. I’ve previously shown you my blending hackle, here it is without fun fur on. I made the tines from welding rods and sharpened each one by hand, they’re very strong:
I also have a homemade swift. I tend to never get to the point where I polish and paint these contraptions, although I do love beautiful tools. I’m simply too busy using them, that’s all, and I know I’m not much of a carpenter anyway.
I use the pegs from the swift with these crude pieces of lumber to warp both directly and – eventually – indirectly. In summer I’m going to find a wall space outside to fix them vertically, as this will make running the yarn back and forth much easier on my back than leaning over the table.

Measuring a 3 m. à skein for space dyeing a pooling warp (or so the plan goes). By moving the pegs AND the bars further apart, I can make virtually any length of warp I desire, there are 8 pegs total. One can hold the cone of yarn!
I can also use the pegs and bars to strap poles onto if I want to make a navajo style warp for my large tapestry loom.
I meant to include an image of my homemade tapestry loom, but we ran into a small problem and didn’t get it finished on Sunday. I’m going to have a look at it and see if I can come up with a new idea for the last bit. It’s functional as it is, but I want to include multiple leash rods I think they’re called. Homemade shedding device kinda thing.
I also made a few spindles before I got my wheel. I don’t use them very often now I have to admit, but they work very well, especially the 14 g which I used to make a lace shawl. I too dream of Goldings and Bosworths, but I’d rather have more fiber.