Corn Marigold – Gul okseøje

Corn Marigold / Glebionis segetum / gul okseøje

Every year I find just one plant, so now I’m going to leave it alone OR, if it’s not too wet I’ll collect the seeds and hope to cultivate them.

I just wanted to tell, that this is also a very lovely dye plant, here some tussah silk top I dyed a couple of years ago:

Corn Marigold / Glebionis segetum / gul okseøje

Min enlige gule okseøje blomstrer i øjeblikket, så jeg vil prøve at lade den være og evt. samle frø hvis det ikke bliver for vådt derude. Det lykkes mig aldrig at finde mere end den ene, som flytter sig rundt i min overgroede ex-køkkenhave, så jeg kan ikke vise mere end dette bundt silke, men jeg syntes jeg ville fortælle at det også er en udmærket farveplante!

Plant watercolours

Heidi told me about making water colours from plant dye, so I just had to give it a go even though I don’t really have the time or energy right now for another project.

planteakvarel4

I still need to work on getting a more concentrated solution, the day I did this I had to go out, so I couldn’t let it sit on the stove to steam for hours. There’s also a matter of how long it’ll keep, my first jars were too tall for the fridge, then I managed to not have time to test the liquid for days. Then it got cold and rainy and not good for picking flowers… you get the idea.

So I’ve just been doing some washes, layering the solutions to see how dark they would go, adding iron and copper as well as soda ash and vinegar to modify. Nothing happened in fact, it may need to be heated – again, no time. And then I noted several days after, that my swatches had changed colour. So there is a possibility for modification, but a high rate of unpredictability or a steep learning curve in knowing what you’ll get eventually.

planteakvarel1

I started out with coreopsis and tagetes, meant to do a batch with weld also. But, well. The tagetes turned out very greenish yellow and the coreopsis nearly brown, so I’ll have to do perhaps birch for a warm yellow (or Dyer’s chamomile, which I only have in a dried variety by now)

Then there’s coffee and tea, tea with iron. I’m thinking mainly backgrounds for illustrations, to start off on something not white.

I tried getting direct prints from the flowers by “hammering” them into the paper, but just got brown smudges. The colour is not waterproof after drying, so wetting these papers again for eco printing would probably wash most of it away.

I’ll investigate some more, at some point, for now I hand over the torch in case somebody else has the urge or would like to share their knowledge. I used 10% alum in proportion to weight of the liquid.

planteakvarel2 planteakvarel3

Plante-akvareldanish

Et meget kort og forhastet forsøg pÃ¥ at lave akvarelfarve fra planter. Det fungerer – men er lidt upÃ¥lideligt mht farveændringer via kobber, syre, base, jern osv, da farverne først skiftede pÃ¥ papiret flere dage efter jeg havde malet det pÃ¥. (og allerede smidt varianterne ud). MÃ¥ske det virker bedre at opvarme hver enkelt variant eller lave dem mens det oprindelige bad er varmt.

I virkeligheden havde jeg hverken tid eller ork, skulle i byen den dag jeg kogte blomsterne, så jeg kunne ikke lade dem stå på blusset og dampe mere ind, vejret blev skidt til blomsterplukning og jeg har bare for meget at se til.. Men hvis nogen skulle få lyst og måske endda dele deres erfaringer, så er bolden hermed givet op. Der er brugt 10% alun i forhold til væskens vægt.

Jeg brugte tagetes og skønhedsøje, egentlig ville jeg også prøve vau og birk, men det er det så ikke blevet til endnu.

Fun with coreopsis

coreopsis05

Last time I tried to grow these, I got a few spindly stalks with hardly anything on them. Which means, this year I totally underestimated how far apart I should plant and now I have a waist high jungle of thick, thick plants with hardly a size 5 footprint anywhere for me to reach the middle for picking flowers. I’ve taken to wearing my Fivefingers, to make the footprint smaller than a pair of Crocs (I apologize to those of you who are fashion conscious, but they DO work well for zipping in and out of the house all day).

I know they work really well frozen, so this year I’ll try drying some and see if that works, because it’s easier to store anywhere. Whereas steak and peas don’t survive for very long on a wardrobe shelf…

coreopsis03

And I’ll have enough to conduct a series of tests, as I’ve heard a rumour they are pH sensitive. If you just want a regular yellow, you need less than half your yarnweight in flowers, or you can start with plenty and dye one skein at a time from orange over turmeric to sunny yellow until it exhausts. It also doesn’t need a lot of heat once the dye is extracted from the flowers, it’s excellent for solar dyeing and on silk.

coreopsis09coreopsis08

So the plan would be:

  1. alkaline for reds
  2. acid for yellows
  3. test skeins in neutral
  4. amounts – work my way from strong dyebath to an exhausted one
  5. if the reds come out – test them with tin, to see if it gets even redder
  6. iron and copper possibly

coreopsis04

You can get a lot of different yellows from the exhaust, depending on amount of yarn, plants, temperature, how long you let each skein remain in the bath etc. Here’s the 2011 batch with some cold dyed Japanese Indigo:

Japanese Indigo

Skønhedsøje

Coreopsis tinctoria er rigtig god at lege med fordi man kan få så mange forskellige nuancer. Hvis man starter med et kraftigt farvebad og kommer 1 fed i af gangen, kan man få fra kraftig orange over gurkemeje-gylden til frisk solgul.

I år ville jeg så også lige teste påstande om at den er pH følsom, rød fra basisk farvebad og gul fra surt. Det blev en helt anden slags gul end ellers, og pga en fejl fra min side (manglende base) lavede jeg også lige en variant med kobber.

Der skal meget lidt blomst til, til alm gul behøver man mindre end halvdelen af garnvægten. Også flot på silke og god at solfarve med.

Det fungerer ogsÃ¥ rigtig godt at fryse blomsterne, men i Ã¥r vil jeg ogsÃ¥ forsøge at tørre, da det er lidt nemmere at opbevare. Bøf og ærter holder knap sÃ¥ godt i et garderobeskab. 😉

coreopsis02

Tagetes 3

tagetes9

Having used double up plant to yarn the first time, I wanted to test the dye properties at 1:1 ratio. I used the tagetes tenuifolia.

I did 1 alum, 1 rhubarb and then 1 copper mordanted in a pot of its own. And yes, it’s different, but not green like the first year, I must have really overdone it back then. Now I’m intrigued as to actually getting green on purpose.

Rhubarb: you disappoint me (again). It may be that it only works in some plant combinations, but frankly then I can’t be bothered. I also have no succes with it on cotton, but more on that later.

tagetes7

These three skeins didn’t even get simmered, I just put them in the warm dyebath to soak. So I decided to test how far I could go on the exhaust, one skein at a time. 5 more skeins, so that’s 200 g yarn from 75 g of flowers.

tagetes8

Tagetes 1

Tagetes 2

Tagetes igen igendanish

Sidst brugte jeg dobbelt op af plante i forhold til garn, så jeg ville lige teste en gang 1:1. Samt det rabarberbejdsede garn og kobber i en gryde for sig.

Denne gang fik jeg ikke grøn fra kobber som det første år, så nu tænker jeg jo på, hvordan man får det med vilje. Rabarber er igen meget skuffende/kedeligt, jeg tror ikke det er noget jeg vil bruge krudt på igen.

Efter 3 fed farvet 1:1 ville jeg så teste hvor meget ekstra farve der var i, så jeg blev ved med at putte garn i, et fed af gangen indtil det blev meget lyst. 5 stk. blev det til, så det er i alt 200 g garn til 75 g blomster! Jeg brugte Appelsintagetes denne gang.

My inner hippie

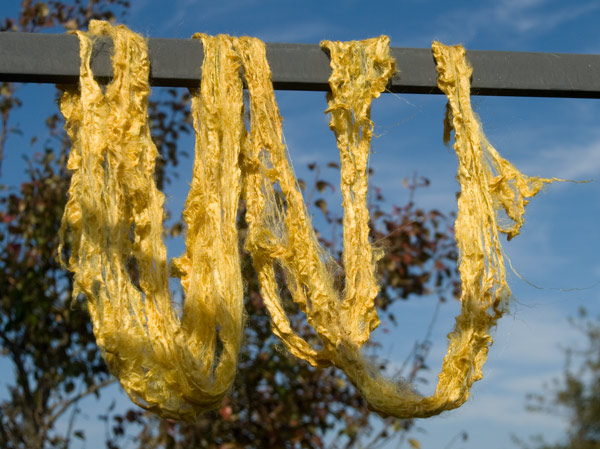
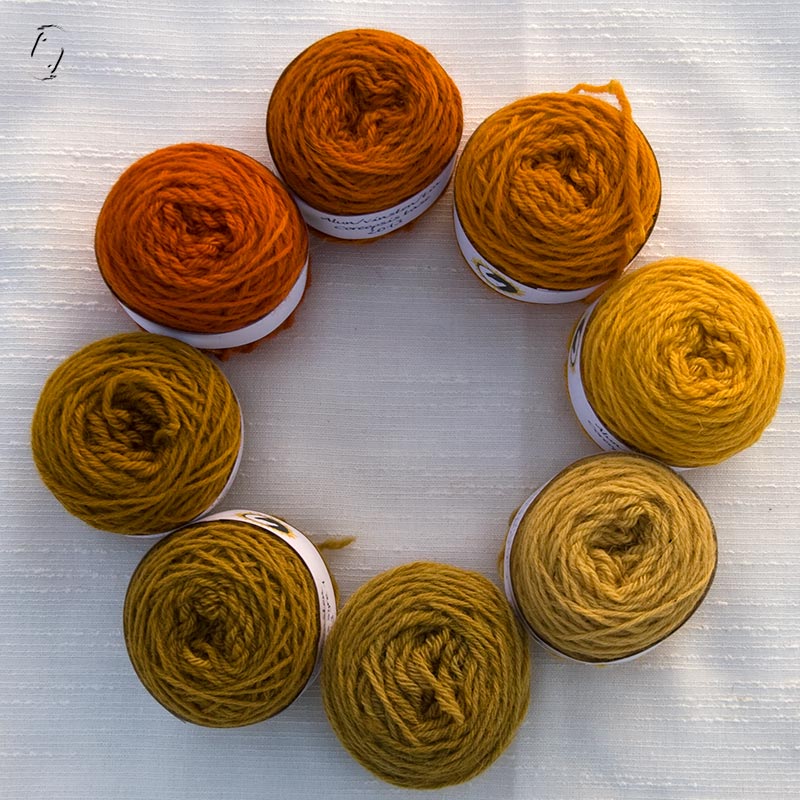
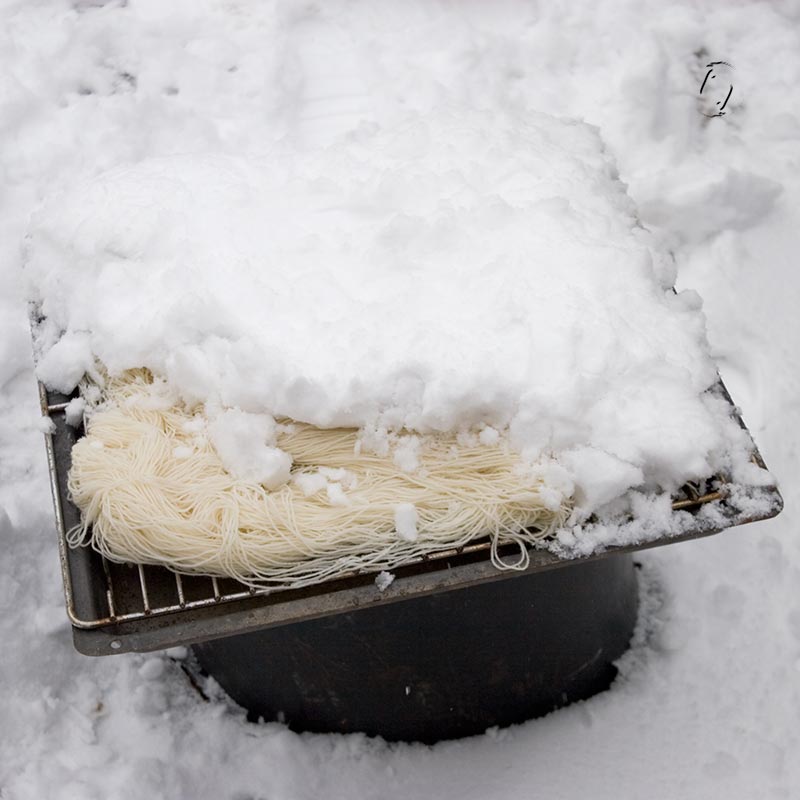
Snow dyeing is a bit like tie-dyeing, only more unpredictable. But groovy. And in this case, very loud. At least to begin with! I hadn’t planned the colours before I got started, which tends to result in too many of them.

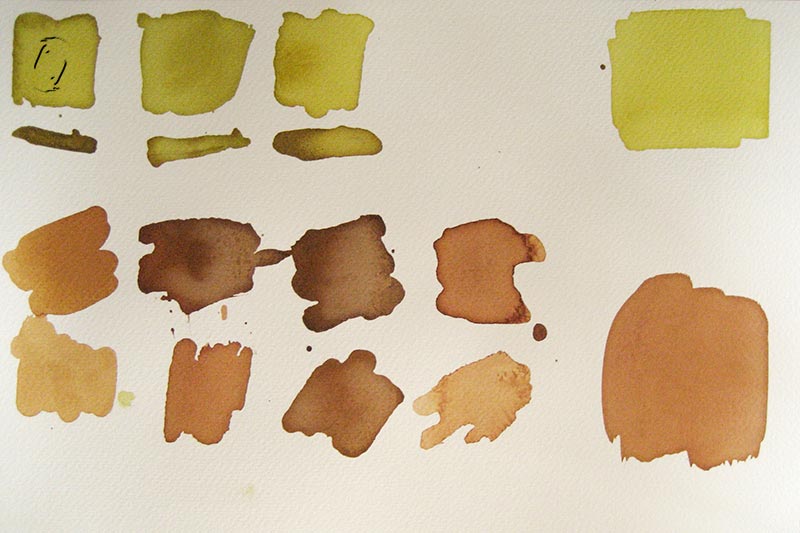
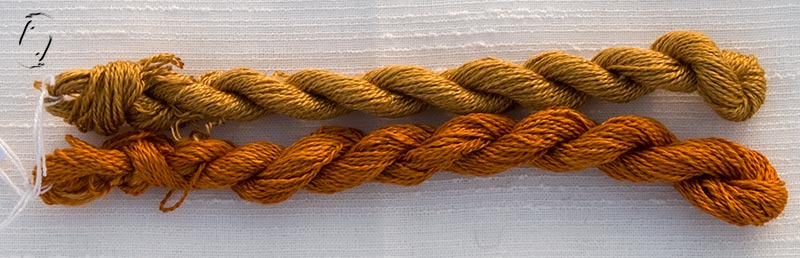
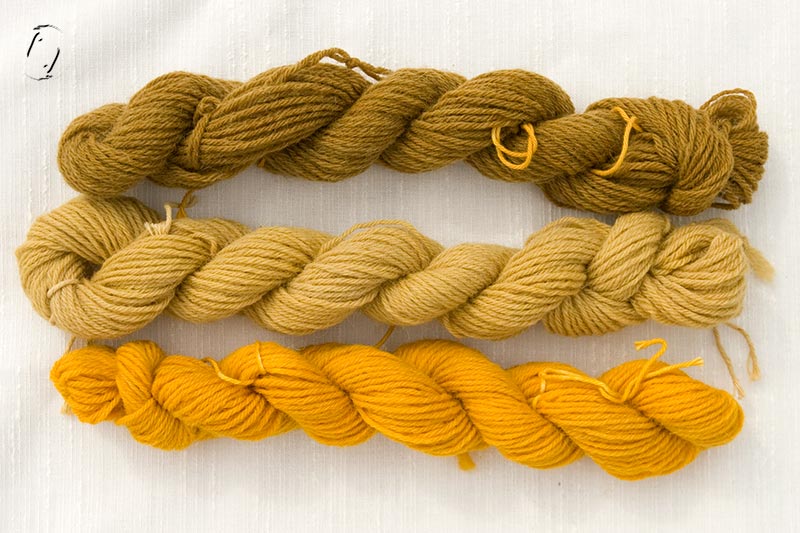
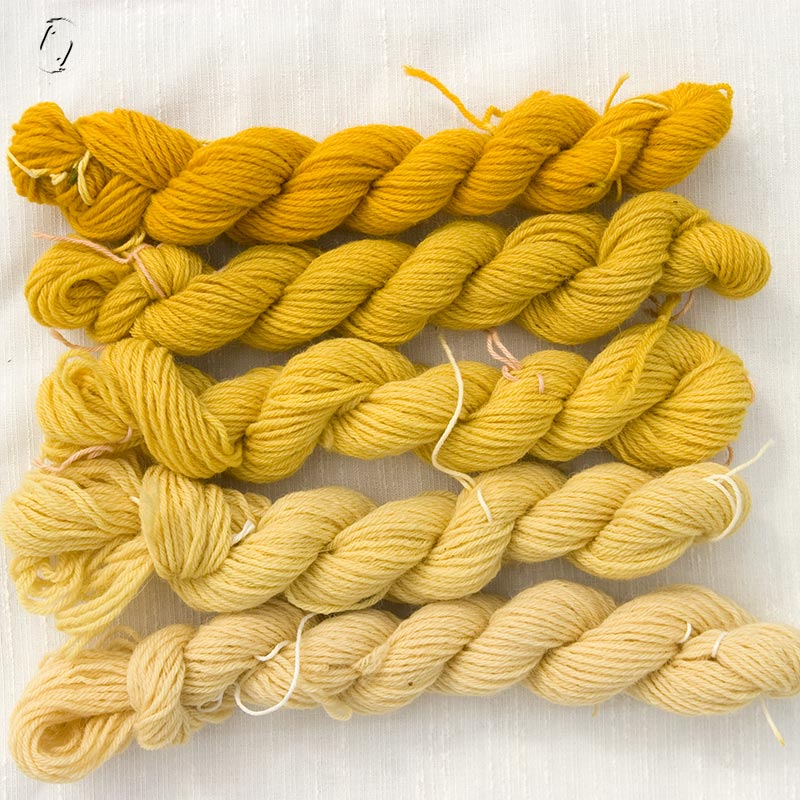
I thought I’d used very little powder, being careful to keep the areas separate, but as you can see throughout the process, it was more than ample. I’d love to try to mix the powders beforehand (for special colours) and apply them to the snow with a small sieve, just a light sprinkle to get spotted yarn. I haven’t got one however. I may try – something. Just one more skein, since the white fluff isn’t going to evaporate this month apparently.

snowdye1

snowdye2

snowdye3

snowdye4

snowdye5

So what happened here?

1 – I know this yarn needs to be tied, and Every. Single. Time I think – “nah, it’ll be ok.” I must love detangling. I do know why I don’t tie it – it’s because I hate it when my figure-8s are too tight, leaving little white bands on the yarn. But, really – learn to do your ties properly.

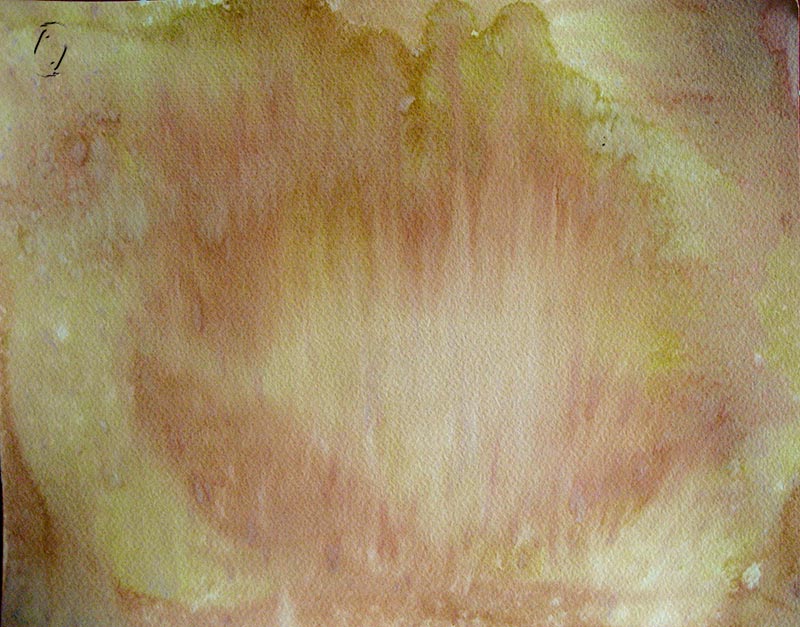
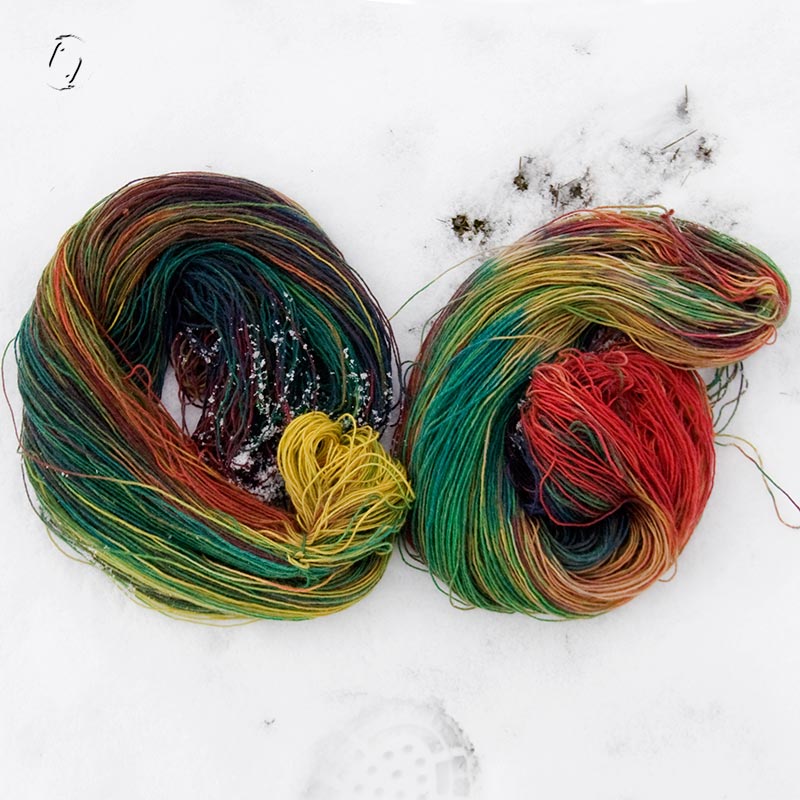
2 – So I also do know my colour wheel and which colours = mud. As long as you keep them separate, fine, and a teeny bit of blending just mutes them, also fine. What I did think but did not listen to, is “let the yarn drip dry before you attempt to set the dye“. It’s been soaked with melted snow, it’s overflowing. A bit of a squeeze isn’t enough. What happens when you lie it inna heap in the sink? The overflow blends. Guess then what. And yes, I do have a strainer. In fact I have 3. This also goes if you want to wrap your yarn in plastic and steam it. Let it drip dry first. OK? Preferably stretched out horisontally, like, leave it on the rack for instance?

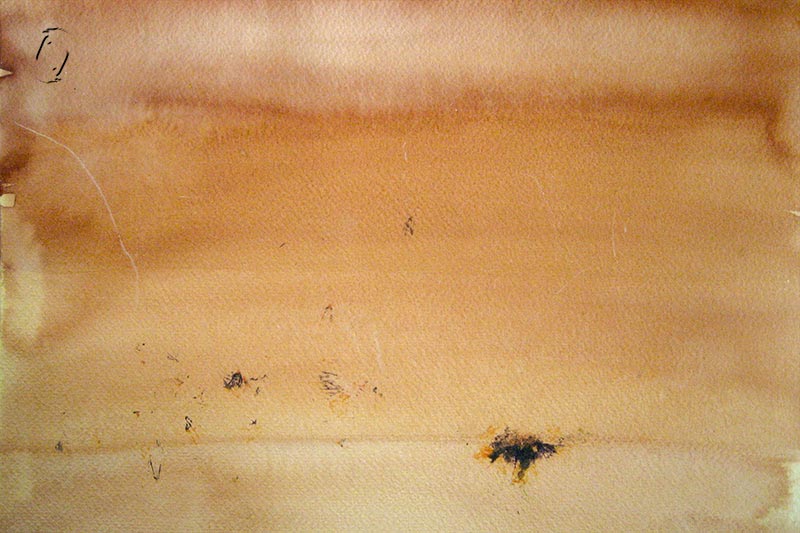
3 – Bubbles and steam does not mean your water is near boiling, in fact it’s only about 65 C. Not enough to shock set your dye. = Muddy water. Flush and repeat. Get your bleedin’ thermometer out.

4 – Do this part of the process when you’re NOT supposed to be doing something else and so feeling guilty and in a bit of a hurry. Resist instant gratification. Surely it can’t be that hard.

I suggest you read some tutorials if you haven’t done this before. I never do until I’ve tried and screwed up at least once, usually twice or more. By which time I’ve usually got it figured out. I guess I have more fun that way, even though I get slightly odd results in the process.

And if you do like muted or mudcoloured yarn – do what I did, not what I said. 😉

danish

Hippie-farvning

Jeg skulle liiiige prøve noget snefarvning nu vi fik et ekstra hvidt drys, og ja, det er sjovt fordi det er ret uforudsigeligt. Især nÃ¥r man kvajer sig undervejs. 😉 Jeg har en tendens til at først læse manualer og tutorials nÃ¥r jeg har forsøgt mig mindst én gang, gerne flere. Og sÃ¥ har jeg som regel hittet ud af det undervejs. Det er Ã¥benbart sjovere end at fÃ¥ et perfekt resultat med det samme?

Opsummering af min engelske fristil ovenfor er:

1. Brug meget mindre farvepulver end du tror du skal. 2. Lad garnet dryptørre grundigt inden du smider det i en gryde kogende vand eller plastwrap til dampning, der er RIGTIG meget overskudsvæske i fra sneen, og den blander sig til brun, hvis man bare lægger garnet i en bunke i håndvasken. OGSÅ selvom man trykker noget af vandet ud. 3. Mål vandets temperatur inden du putter garnet i, det er ikke ved at koge når der er damp og bobler, det er kun ca. 65 grader og det trækker endnu mere brunt ud af garnet.

Det smarteste er naturligvis at vælge farver som ikke mudrer, det ved jeg udmærket godt hvordan, men nÃ¥r ikke jeg har lagt planer pÃ¥ forskud tænker jeg altid, at det gÃ¥r nok lige. Jeg binder heller ikke feddet op, selvom jeg ogsÃ¥ ved at dette garn har brug for det, fordi der stort set ingenting er til at holde pÃ¥ det fra fabrikantens side. Jeg ved bare at jeg bliver sur hvis jeg sÃ¥ binder for stramt og fÃ¥r hvide bÃ¥nd pÃ¥ garnet. Say no more…

TÃ¥lmodighed er en dyd jeg ikke har sÃ¥ meget af…. Nu kan jeg sÃ¥ bruge x antal timer pÃ¥ at vikle skidtet ud!