Beginner’s mind

Heidi asked what my thoughts (and actions) were on conquering the fear of white canvasses. So I thought I’d give it a go and see if summing it up would help myself in the process too! And of course it’s a process, not a one-step fix. I probably won’t get it all in one blog post either…

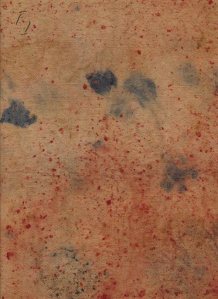
Well, it’s a start, the canvasses are no longer white even though they’re filthy. (keep reading below)

I think the problem for most people is the illusion that they need to be perfect. At once. Always. Don’t get me wrong, I think art is something to be dead serious about, just imagine a world entirely without it! Well, No, right? Well, say hello to the World Champion of perfectionists. I know exactly, inside my head, what I want my stuff to look like. And if I can’t pull it off in first try (usually I can’t), I resign, tell myself I have no talent in this area and sulk about it. A lot. It’s even been a motto thoughout my life, “if I can’t do something really well, I won’t do it at all, and if I can’t have what I want, I don’t want anything”.

Lately I seem to have changed. I still want to be good and I have very high standards for it. But the concept of “practice” has suddenly dawned on me. Oh, I knew that old proverb, but really, it didn’t seriously apply to myself. Now I’m suddenly game to give it a try. Worst that can happen is – well, at least more will happen than before, when I didn’t do anything but wait for the perfect moment, running over the theory in my head (my version of practice). I might even have fun along the way.

Are you still hesitating? Break it into small steps. Arrange every step to be a succes in itself, be satisfied with your progress even before you get to the actual creating. Buy supplies, arrange a workspace so your supplies are there and ready, allow yourself to be fearful, push and rest, advance and retreat. Doodle a bit, go to an art exhibition, make really silly collages from magazines if that seems like a smaller step than brush on canvas. Tell yourself you’re just going to paint a nice background to get some colour happening. Don’t overly pressure yourself, nor let yourself get away with excuses forever.

Of course, some people like to just jump in, but they’re not reading this. It’s ok to sneak up on the action so to speak if that makes you more comfortable. What set me in motion and gave me a new urge to paint again, was learning to spin in 2011. I suddenly rediscovered the joy of working with my hands, not just my head, after years of photoshopping and Flash animating. My creativity suddenly woke up after being near dead for a couple of years (not good when you are a self employed graphic designer) and suddenly I had all these visions about colour and yarn designs and all sorts of things. Sometimes what you need to get the spark going is not even related to where you want to go!

So, what are some of the excuses the mind comes up with to postpone the moment of “failure”?

  1. Equipment costs a lot of money.
  2. I don’t have enough room in my house.
  3. The kids (husband, cats) won’t leave me alone.
  4. I’m exhausted today (again).
  5. I have no time.

And the classic:

6. I don’t have any ideas….

Well…

  1. Yes, it does. You can get cheap acrylics and low quality canvases at the supermarket from time to time, you can paint on almost any paper, doesn’t have to be 300g acid free watercolour paper straight off the mark. You don’t really need an easel, technically you can just cover a table in old newspapers. I always put nails in the wall and hung my frames on those. But even so, a decent starter collection of stuff does make a dent in your budget unless you have stuff from 20 years back stored in the garage like I did (and then I still spent some on this and that. And strangely enough, when you begin using it, it’ll be gone and you need more). But you have to make a decision. If you want to paint, you do need colours of some kind and a surface to put them on. Easier if you want to write, if you’re reading this I assume you have a computer, so you don’t even need pen and paper (although it actually does give another perspective on the process to handwrite from time to time)
  2. Paint smaller. Something that fits your chosen table, see note #1. Keep your paints in a handy box or suitcase that you can get out in a jiffy and get cracking.
  3. I don’t have human kids, but I imagine this can put quite a damper on your ambitions. I hate being interrupted when I finally get started and focused on something, impossible to stay in the mood! Or have someone stand behind me and just watch. I don’t have a lot of advice to offer I’m afraid, if you can’t train the kids to give you an hour in peace, or their other parent to deal with them, their grandparents to pick them up for the weekend, you might want to cover the whole room in newspaper and give them their own brush and paper. My solution to a small house and a chatty partner has been earplugs and mental blinders. Even if I feel eyes on my back, if I do not want to take a break I.DO.NOT.TURN.
  4. THIS. I suffer from headaches, back aches, chronic fatigue among other annoying things for years. BUT. Another reason you are feeling tired might be the lack of creativity in your life. Art gives you energy, excuses and avoidance drains it. For real. See if your head doesn’t clear and your confidence gets a boost simply from that one victory of starting your first painting. Then have tea, pat yourself on the back, take a nap and have another go.
  5. Do you ever watch tv? Do you have to? I mean, is there really, really ever anything on that is more important than painting? Your choice…
  6. So you have no ideas? So why do you even want to make art? Like me, you probably can’t answer the last question, you just do. No matter how you try to be sensible, it keeps sneaking up on you, the urge, the dreaming. I think the more we keep telling ideas that they don’t exist, the more they’ll oblige. Leave the door wide open and they begin to trickle back in, soon you’ll be flooded if you let them come. In fact, you may have too many ideas and postpone acting because you can’t pick the best one, because you fret about all the ones you didn’t pick. What I discovered is, you don’t have to finish all of them. Just acknowledging them by writing them down in a notebook with a few strokes of crayon, is enough to satisfy your creative mind. Most of those ideas never get any further, but by taking note, you keep the flow coming in, and you free your mind of clutter that prevents you from focusing on one project at a time (ok, 2 or 3 is ok, right?). You’ll find that some ideas survive, others are no longer as important, they’ve done their job. Still not working? Go on expeditions, see something new. Take the kids to the zoo, they’ll be exhausted and sleep early, so you get a few hours to paint your impressions of the day.
A friend of my grandfather’s made me this about 25 years ago, great for painting on a table.

Then after you’ve inched your way towards action, no more excuses, it’s all sitting there, ready for the taking, staring you in the face, be aware of the following facts.

Rule #1: There will be obstacles. Such as, to mention a few: You finally get your A into G, plastic on the wall so you don’t splatter, jars for water, paper towels within reach. And then you discover that A. your ultramarine is not in as good shape after 10 years in the garage as you thought it was, B. most of your brushes leak hairs and dust like mad, completely ruining your canvas at first stroke (this is where the paper towels come in) C. you really need a waste bin for those paper towels. And more water for all those dusty brushes. You probably should have changed your clothes too. Oh well, and that plastic sheet on the wall could be a large contributor to all that dust, find a roll that hasn’t been in the garage or under hubby’s bed (or wherever he kept the darn thing).

Rule #2: There are no rules. A colour you dislike can be painted over as many times as you like. The painting can be turned upside down halfway through the process (any time during the process, actually 😉 ) You can use both hands, one at a time or simultaneously. Give it a go, paint with your “other” hand, kick logic up its backside.

Rule #3: Creativity is not linear or schematic. You need to listen to and follow your impulses. Even if it means that after a week of setting up your painting workspace, you have a sudden urge to spin purple yarn or rearrange your kitchen cabinets. Follow the flow. Sometimes the first step in a new project is finishing an old one! Art is not a job, don’t restrict yourself to one form just because you’ve decided you should. Life and your subconscious will tell you where to go next, even if it seems erratic. Now, if something tells you that you need to finish ALL your house chores before you’re allowed to paint, that is not your subconscious speaking, it’s your mum, and she ought to go and mind her own business.

Rule #4: Don’t talk, just do it. And keep doing it, no matter what rule #1 throws at you.

Julia Cameron: Walking In This World (The Danish version is “The art of being creative”)

Flora S. Bowley: Brave Intuitive Painting

Want some quick and easy ways to start playing, making art with no ambition of succes whatsoever, just fun? While I was writing this and in the process of testing my oil paints I remembered all sorts of little tricks, in fact so many that I’ll save them for another post. Stay tuned!

> 1. Finally
> 2. Beginner’s mind
> 3. Creating creativity
> 4. New Tricks

.

At tænke som en begynder

(som sædvanlig en ikke særlig ordret oversættelse fra engelsk…)

Nogen gange tager vi kreativitet alt for seriøst og kommer ingen vegne fordi vi helst vil forudsige resultatet inden vi overhovedet er kommet i gang, og det skal naturligvis helst være “perfekt”.

Og så kommer vi aldrig i gang med fx. at male, vi snakker bare om det i årevis, køber måske lidt pensler og farve i ny og næ når vi fristes i butikken, men det perfekte øjeblik at gå i gang opstår på forunderlig vis aldrig af sig selv.

Læs videre “Beginner’s mind”

Paper prints

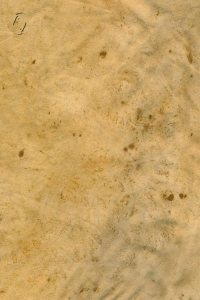
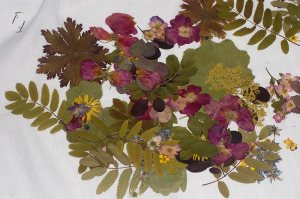
Dry flowers apparently aren’t my thing, they look very dull and broken, some leaves might be useful. I don’t know if I went overboard squishing them real hard with clamps on the books?
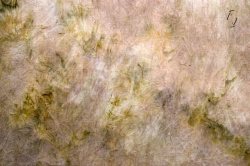
I do still plan to try some garden printing, when time allows. There must be stuff out there that I can use even late in the season! Maybe I can do it on pieces of cloth that I plan to plant dye, if I use acrylics, they shouldn’t wash off no matter what I put the material through afterwards, at least that’s the deal when I get it on my clothes…. (does anyone paint and manage to look pretty throughout?) I wish I had some more fluid paints than the ones I have, guess I’ll have to invest in Golden acrylics next time.

In the meantime I saw those posts on plant dyeing on paper, which I just had to give a go although late in the season. Next summer and flowers and new dyebed (which hubby at the moment has decided to till for me as a first prep! Yay him!)

First session went quite well although I had no idea how to “steam” the paper, nor how to best keep the sandwiches tight and not floating apart. So I’ll be getting some alder leaves and some coreopsis from the freezer, and hey! How about all those dry homegrown weld and Dyer’s chamomile I collected!? Any Woad leaves left out there I wonder?

Time to get a bit scientific about it. Two pair of sheets soaked in vinegar, two in aluminium acetate. Alder leaves, more yellow birch leaves and Liquidambar styraciflua. Another sandwich, same mordants, strawberry leaves green and yellow, sage, celandine. In between the 2 sets, a layer of frozen coreopsis tinctoria and blue columbine flowers.

Then there’s the consideration of temps. Will a too high temp give dull prints? How low can you go and still get steam? I started with 150 C because 100 didn’t seem to get steamy. 120 doesn’t seem to quite work either, no visible steam anyway.

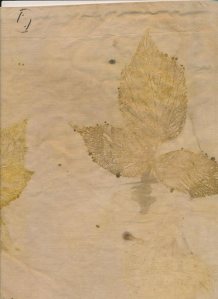
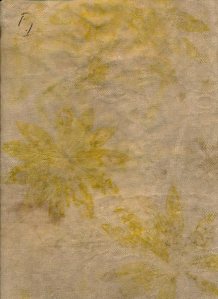
I’m showing both front and back of some sheets, since they could be used either way.

Unfortunately at some point in the drying process, I lost track of which 4 sheets were aluminium soaked instead of vinegar, AND forgot in which way they were different. I could identify them by which first sheet has the grate imprint from the oven, but after a 3 day break I also forgot which batch was on the bottom. DUH. Scatterbrain.

I’m happy enough with these results that I’m going to keep playing with paper and plants. Test which seasons give the best results and see if I can find any info on it. Some also say use “dead” leaves collected from the ground, some even use older leaves and soak them first. Hmmmm – I wonder about the above pressed flowers and stuff now?!

A short search gave me:

Cassandra Tondro on eco printing with a recipe (backwards) for paper steaming

The natural surface – great forum

Dip and stain

Threadborne list of plants to use

Next challenge: If I order a new batch of water colour paper, can I resist getting pens and inks and other lovely supplies while I’m at it?! Now that I’m getting a micro painting studio and all….

Cloths part 3

Time for the last set of plant print experiments! I wasn’t really inspired to attempt any nice photography, so I just popped them in the flatbed scanner for you.

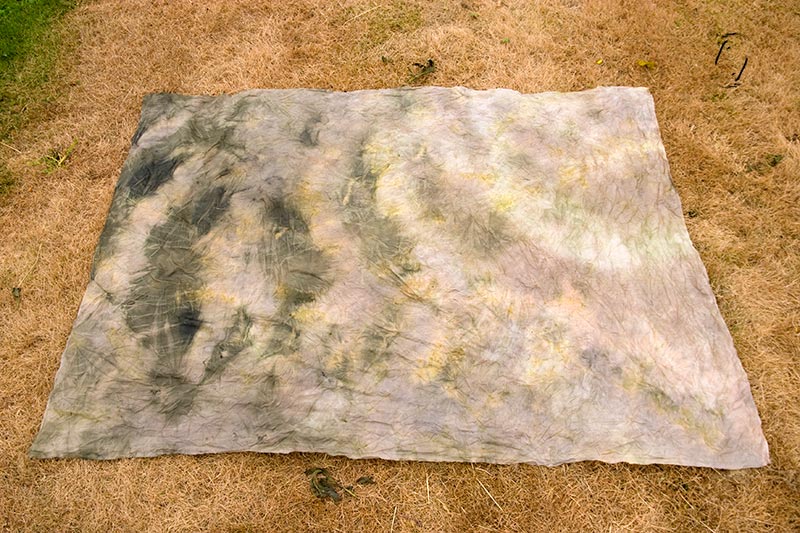
Sheet from last batch as well as the “mystery fabric that doesn’t take any colour” (I think we’ll just call it Homer from now on) had a bath in aluminium acetate then some powdered madder root and a handful of dried hollyhock heads, and the sheet, previously dyed brown from longterm exposure to celandine, had a short bath in – well, celandine. Not a lot of improvement, so I wrapped it up with some fern leaves. Nothing much happened for weeks, so I steamed it. And if you squint you might just be able to see a weak fern pattern…. Mostly, what I got was a bunch of brown, mouldy fabrics smelling like a cow’s a*se.

The raspberry leaves did print nicely – from the top side of the leaves only, the fabric covering the back of the leaves have 0 change. And, well, the lupine leaves? yawn…..

I actually think I’m giving up on this. Rose leaves gave me nothing. Alchemilla mollis, nothing.

I may however, decide to try with paper, after reading this blog. Tell me it isn’t cool!

http://wendyfe.wordpress.com/tag/eco-prints-on-paper/

Of course, I’m rapidly running out of leaves, so this will be for another year. Tomorrow I’ll go check if any more of these are still up (and no, I can’t imagine they’ll actually print red)

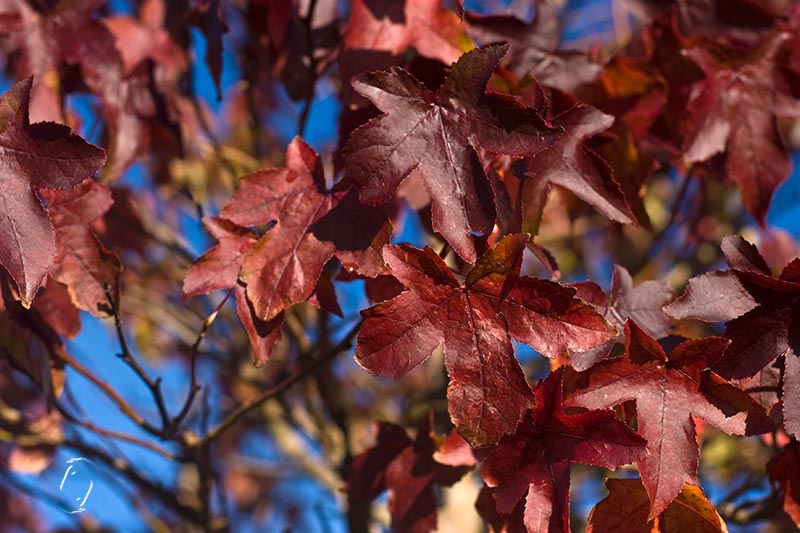
Liquidambar styraciflua

Leave a Comment

Plantefarvning på stof

Tid til flere eksperimenter inden sæsonen er slut! Lupinblade og bregner rullet ind i bomuld. Forsøgte mig også med rosenblade – ingenting skete. Faktisk skete der absolut ingenting med nogen af mine forsøg ved at blot lade stoffet ligge med planter i og holde det fugtigt, så jeg prøvede at dampe/koge et par stykker. Hindbærblade virkede ligeså godt som egeblade, men kun fra forsiden. Tørrede stokrosehoveder var derimod forbavsende gode, glæder mig til at farve garn med dem.

Og der sker lige nøjagtig ikke ret meget, ud over at det begynder at stinke efter en måneds tid, så nu tror jeg ærlig talt ikke jeg gider prøve igen lige foreløbig, slet ikke på bomuld i hvert fald.

Cloths part 2

Time to open the rest of the packages from August 14th. The first package was opened on August 21st and now awaiting further experiments…

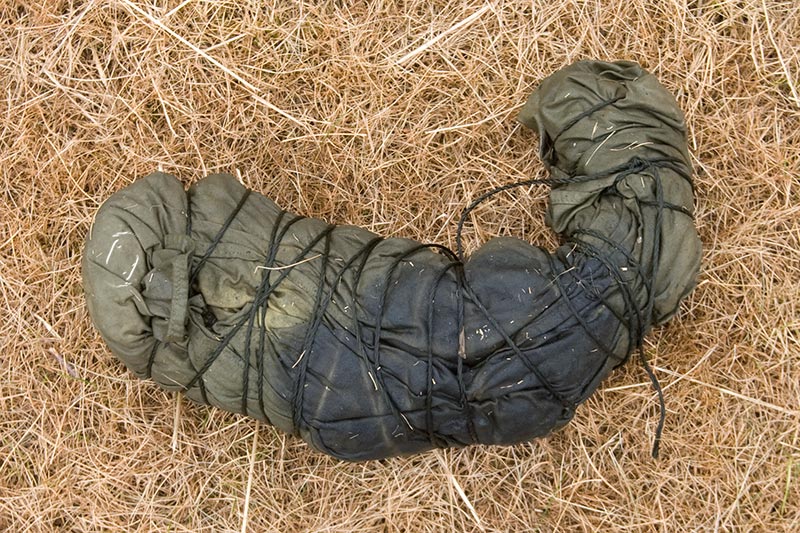
The sheet on the right was previously washed with soda, cooked with sumak leaves and was soaking in water with iron while rolled up with celandine. The pillow case similar although no tannin before but soaking in water with oak leaves while printing.

Discoveries so far:

  1. Oak leaves = nice clear prints
  2. yellow flowers = vague yellow blotches
  3. Sage leaves = absolutely nothing. Maybe a pale shade of yellow?
  4. Celandine leaves in a heap = again, turns brown when sitting too long
  5. Put cloth in bucket of whatever = only the outside layer takes any colour at all.
  6. My mystery cloth just lost whatever I put on it previously and didn’t take anything from the leaves it had been rolled up with.

None of these cotton rags were properly mordanted, which is the next process I’ll be trying to see what the difference is. Tannin and aluminium acetate, some with sea water and aluminium. Some with iron as well, before or after. But I probably won’t get to actually dyeing them until next summer. Rhubarb leaves will be on the menu as well.

Another set is brewing – hoping for prints from lupine leaves among other things.

Funny thing though, the celandine dyed sheet is brown – but when put into water again, the water turns yellow.

Leave a Comment

Plantefarvning på stof

Tid til at åbne de sidste pakker jeg præparerede d. 14. august. Den første omtalte jeg d. 21. august, den er nu tør og afventer yderligere eksperimenter på et eller andet tidspunkt.

Der kom ikke så meget ud af det, svaleurt giver stadig brun ved langtidsfarvning og kun egebladene lavede print på stoffet. Det ene stykke stof mistede de print det havde inden og er nu næsten “rent”! Jeg ved ikke helt hvad det er lavet af, det er en slags kanvas og virker ikke syntetisk, måske hør?

Cloths part 1

Well, part 3 really. Since I already showed off some cloths from last year and blabbed about the new project in another post.

So, I made notes. I did not number those notes and match them with my buckets however…. lahdeedahh. Some I remember from description, but…

I was going to leave them all there FOREVER, but in less than a week some had taken on A LOT of colour in the fabric itself, the print part I couldn’t see of course. What to do? Open or leave them?! ARGH!

Ok, so I opened ONE. Seven days in. Hot weather (finally). And did recognize it after opening, so the registration is back on track.

This cloth had previously been soaked in red wine with a horse shoe on top. Then bundled with tansy, daylilies, something sunflower like and sage. Cold water bucket. I also poured in some exhaust from the tansy test halfway through, I think that’s what’s giving the olive green with the iron and also being the outer layers of the package. There goes my theory about tansy not reacting with iron!

I learned that you don’t get clear plant prints when submerging the cloth in fluid. So next thing would be add flowers to damp cloth and then not to use more water. I should probably go read my book….

In the mean time I’ve been cooking the rest of my cottons in tannins and aluminium acetate. So they should be ready for further experimentation. Next up if I come across old bedsheets etc. will be seawater and milk, and I’ve got some dried sumac bark from last year. I’ve also aquired some texts on dyeing with clay and rust among other things, can’t wait to dive into them. Bring on winter, see if I care! (Yeah, I said that last year too and spent the entire winter being sick = no crafting, but I’m not planning on a repeat). Silk fabrics, cellulose fiber yarns – lots to try! As well as trying out the procedure on wools for comparison with ordinary mordants. There’s no end to the experiments, somebody find me a huge grant?! 😀

Funny how boiled oak leaves left to steep for a few days, look and smell JUST like black tea. So I wonder if that’s the smell of tannic acid? I didn’t have a sip though 😉


Leave a Comment

Plantefarvning på stof

Kort fortalt, jeg tester alle mulige måder at få plantefarve til at hæfte på bomuld. Garvesyre fra rødvin, egeblade, bark, aluminiumsulfat, havvand, mælk, jernopløsning. Første test var 4 forskellige spande med blomster og salvie rullet ind i lagner og puttet i spande i drivhuset.

Efter en uge hev jeg første bundt op og har bl.a. lært at man ikke får tydelige print af blomsterne ved at have stoffet liggende i væske, der skal man nok sarte med fugtigt stof og så snøre blomsterne ind og lade være. Jeg kunne også studere lidt først, men det er typisk mig at bare prøve noget. Jeg burde nok tage og få læst min bog om emnet! Jeg har også fået fat i nogen e-bøger om at farve med ler, rust og andet sjovt. Vinteren kan bare komme an og gerne med en del mindre sygdom end den sidste, hvor jeg sagde det samme og så blev det bare til nul spinding! 🙁

Jeg skal også have spundet nogen forskellige plantefibre og teste med dem, måske silkestof? Nogen som vil donere noget kedeligt hvidt bomuldsgarn? 😉

Kogte egeblade som har trukket et par dage lugter fuldstændig som og ligner sort the. Gad vide om det simpelthen er garvesyre der lugter sådan? Jeg smagte dog ikke på det….

Jeg lader stoffet tørre mellem hver behandling, jeg håber det sætter sig og ikke bliver vasket ud i næste omgang, men de kloge påstår jo at det kan lade sig gøre på den måde.